It’s the number one food holiday in America. Unless you are a member of my family. Then ALL of the holidays are food holidays! But Thanksgiving is unique, and we don’t stray far from the traditional.
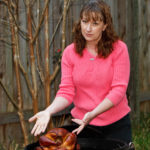
Personally, turkey was not high on my list of favorite foods. Growing up, it was always dry and tough. And there has always been something unappealing about the smell of roasting turkey. So, several years ago, I decided to stop roasting my turkeys and start cooking them on the grill. Grilling evolved into smoking the beasts. And we always did the deed on my trusty old Weber grill. It made that smoked turkey something my fam8ily looked forward to every year. Although it’s easy to accomplish, it takes time.
There are several steps to making this smoked turkey, and a few extra pieces of gear. So let’s get started!
The Turkey
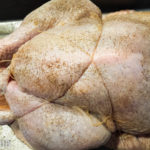
Choosing a turkey for Thanksgiving is the first step. Frozen or fresh, injected or not, all of these options make the turkey slightly different. My personal preference is a non-injected, fresh, natural or organic turkey. But those birds come with a price tag. A 14 pound organic turkey can set back the budget by $45 or more, depending on the price per pound. But versus the cost of beef or lamb, it’s still a great option for feeding a lot of people. An inexpensive frozen and injected turkey is fine for this recipe, but requires a few minor adjustments. The turkey should not be any more than 16 pounds. If you need a bigger bird, buy two smaller birds. Buy your turkey several days in advance, stow it in the refrigerator in its original packaging, until the day before Thanksgiving. This will give the frozen turkey time to defrost. But don’t worry; if it isn’t completely thawed the recipe will still be great!
The Brine
This is a very important and required step for a juicy delicious bird. You will need a few bits of equipment, but nothing incredibly expensive. You will need:
1 5 gallon food grade bucket with a lid (don’t use that old paint bucket!)
1 62 quart ice chest
1 large coffee filter or cheesecloth
The Brine Recipe
1 gallon cold water*
1 quart apple juice or cider
1 quart ice
2 cups sugar (brown or turbinado adds great flavor)
2 cups kosher salt (1 cup for injected turkeys)
2 bay leaves
1 tablespoon whole allspice
1 tablespoon whole peppercorns
1 teaspoon whole cloves
2 teaspoons whole dried juniper berries (optional)
1 sprig rosemary
2 tablespoons granulated garlic
2 tablespoons granulated onion
2 tablespoons ground cumin
1 teaspoon smoked paprika
2 lemons, zested, cut in half
The morning before Thanksgiving, make the brine. In a 6 quart saucepan combine 1 quart of water, the salt and sugar, whisk to dissolve. Place the allspice, cloves bay leaves, peppercorns, rosemary and juniper berries in the center of the coffee filter and tie closed with a butcher’s string. Place the bag and the rest of the herbs and lemons in the saucepan. Bring the mixture to a rolling boil. Cool the mixture completely before adding to the brine bucket. This portion of the brine can be made a few days ahead.
Prep the turkey
The night before Thanksgiving, remove the turkey from the package. Dry on paper towels to remove any excess liquid. Put the bucket in the ice chest. Place the turkey in the bucket with legs and back facing up. Pour in the brine solution, 2 quarts of water, 14 pounds of ice. the sealed coffee filter and lemons, and apple juice. Slosh it around to combine. Cover tightly and pack cold packs around the bucket, cover with blankets towels, etc., to keep the bucket as cold as possible. Put the ice chest in a safe place away from heat and hungry animals. Then go to bed. The turkey will be safe for the next 12 hours. At this point you have the choice of oven roasting or smoking. Either way this will be one incredible meal!
After 12 hours and no more, in the brine, remove the bird to a large pan lined with lots of paper towels. There is no need to rinse, and in fact this could cause more problems with cross contamination and salmonella. Discard all of the liquid, the bag, and the lemons. If possible, place the bird uncovered in a refrigerator while preparing the rub and fire.
The Rub
This is where we add another layer of flavor and that golden brown skin gets a boost. Do not add any salt to this rub, unless you prefer a very salty turkey.
¼ cooking oil (canola, peanut, grapeseed)
2 teaspoons ground white pepper
1 tablespoon each granulated garlic, granulated onion, and cumin.
½ teaspoon ground allspice
½ teaspoon ground cayenne (optional)
2 teaspoons dried oregano or thyme.
2 lemons, zested and halved
2 sprigs of rosemary (optional)
Combine the rub in a bowl or shaker. Rub the turkey liberally with the oil. Starting with the back, sprinkle on the rub. Turn the bird over, and separate the skin on the breast from the meat. Just gently slip you hand between the release the membrane. Lifting the skin gently, Sprinkle in some of the rub. With your fingers, distribute the rub under the skin, and reach as far possible to spread the rub on the thighs as well. Sprinkle any remaining rub over the exterior of the turkey. Sprinkle on the lemon zest. Stuff the cavity with the lemons and rosemary. If you are roasting in the oven, preheat to 325 degrees. Place the bird on a roasting rack in a large pan. Tie the legs with butcher string and fold the wings tips under the back. Do not cover! Cook the turkey for about 3 hours, until the internal temperature at the bottom of the breast, is 145 degrees. Take the bird out and heat the oven to 425 degrees. Return the bird to the oven and roast for about 45 minutes or until the internal temperature reaches 165 degrees. If the temperature goes above 165, don’t worry! You brined and the bird will stay moist and delicious! Use one these nifty probe thermometers for both roasting and smoking!
The Smoker
It’s not really a smoker, but my old style Weber kettle grill has done the job of grilling and smoking my turkeys. It you have a smoker, you probably don’t need these instructions, and I trust you know how to safely cook a turkey. However! If you have a Weber and want to know how to do this, keep reading.
First off, this technique is for a faster hot smoke. I haven’t had much luck with heat control, so this can be a bit tedious. I recommend a comfortable lawn chair and some adult beverages for the time spent outside. Plus, I live in Texas where the weather is warm in November, so it’s not a bad way to spend sunny fall day. You will need:
1 20 pound bag of traditional briquette charcoal, you’ll need about half, but it’s good to have extra.
Assorted wood chips. I use apple, pecan and oak.
4 cinnamon sticks
1 tablespoon whole cloves
A bucket to soak the wood chips, cloves and cinnamon
Some type igniting device and a chimney starter. I don’t recommend lighter fluid
Trays for charcoal and wood chips
Drip pan
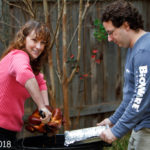
Soak about 4 cups of the wood chips, cloves and cinnamon sticks for one hour, 1 cup each of pecan and apple and 2 cups of the oak chips. Remove the grilling grate from the kettle and place the chimney starter on the bottom charcoal grate. Fill the starter with charcoal and stuff the bottom with newspaper and light. The coals are ready when most are covered with a light amount of ash and glowing red. Place the trays for the coals on two sides of the kettle. CAREFULLY pour the hot coals into the trays. Place the drip pan in the center, between the coal trays. Place the grill grate over the coals with the hinged sides over the coals. Open the vents on the top and bottom. Allow the grill to heat and brush off any debris from previous grilling sessions. Mop some cooking oil on the grill surface. Your turkey should be nearby for the next steps. Add 5 or six unlit coals to the trays and carefully add about half of the soaked and drained wood chips to the trays. Insert the thermometer probe into the thickest part of the thigh and set the target temp to 165 degrees. Carefully place the turkey in the center of the grill. Close the lower and the lid vent halfway. Cover and walk away for one hour. Do not lift the lid, even if the smoke seems to have slowed. After one hour add additional coals and a few more of the smoke chips. Open the bottom vents fully. If your coals seem close to going out, light another chimney on a concrete surface and add the new charcoal to the trays. Cover and leave alone for one more hour. At this time you can remove the turkey and finish in the oven or keep the fire going for one more hour by adding hot coals. When the turkey reaches your desired temperature, remove from the heat and tent with foil as it rests and you finish preparing all of your yummy side dishes!
Although this is very time consuming, it is the most delicious turkey you will ever taste, and you will never go back to oven roasting. By grilling or smoking your bird, you will have more space for all of the other goodies you create for your Thanksgiving.
Smoked turkey is one of those meats that can go either white red or rose’. And I have some ideas. My first pick is Boen Russian River Pinot Noir. It’s rich wine with a smoky note that will compliment the turkey. Rose’ is very trendy, but it’s also a great choice for turkey, smoked or not. My rose’ pick is Sauvion Rose d’Anjou. This a fruity and full French rose’. Finally the Chardonnay, the most traditional wine for Thanksgiving. My pick is Jam Cellar’s Butter. As the name claims, it’s a full buttery Chardonnay that will make everyone happy.
The links on this page are options and suggestions for items you can purchase from various companies. If you make a purchase, I may be compensated. Thanks for your support!